Wednesday, October 19, 2011

baby shoes

download pattern here


<><> <>I made these for a girl I visit teach, who just had a baby boy!
Ok so cut out the pieces as described on the pattern. You should have 4 top pieces and 4 sole pieces as well as any embellishment you may want to add.
Just a not in sizing up the pattern cut where it says to cut the buckle part off and then add the amount labeled 3-12 months and then reattach the buckle piece.


Start by sewing right sides together the two top pieces. Don't sew the outside line together.


Then turn it right side out and top stitch the edge.


Then add any applique or design you want to the shoe. (you could also do this last if you want)


Then with right sides together pin the top to both layers of the sole. You want the "buckle" piece to be against the sole and then the toe of the shoe will over lap the buckle.

Then sew around the edge. To finish it off nice I trim away the extra fabric and then serge the edge, but it is optional.


I made these cuties for my good friend who is having a girl after 2 boys! I am very excited for her :)

Saturday, October 15, 2011

Halloween wreath

This Halloween wreath was super easy, but time consuming..so do it when you have time, but don't do it all at once! (oops the letters got crooked, I'll have to fix that :)

you need about a total of 1 1/2- 2 yds of fabric ( I had some scraps and I also bought 4 different kinds of material)

1 wire wreath form (I used a 12" form I think)
if you use a bigger form, you need more material!

1 large ribbon for the bow

boo letters (I cut out of carboard, painted, and glued beads)

brooch pins (to attach the boo letters)

cut your strips to 1"x6" pieces. make a pile of the different kinds of material and go in order when tieing them..or tie them in a random order. Just start at the top, on the inner circle and start tieing your strips in double knots side by side.

once all your strips are tied on. use chipboard letters or cut out your own and decorate it.
glue on the brooch pin on the back of the letter with hot glue and pin it to the wreath.

tie a bow and use a brooch pin and pin it to the top.

you are now done and hang it on your front door


Wednesday, October 5, 2011

Heart Brooch

There are so many tutorials out there that are amazing.. seems like these days you can learn to do anything online!

So I figured I need to become a little better on giving tutorials for anyone interested.. and I have yet to master it, but I hope this is efficient for now.

To make a heart brooch.. this is what you will need:
cardboard
hot glue
felt
fabric to cover heart
scrap fabric 1"x 24" (about).. depending on how big you want the heart to be (mine is about 2"x3")
beads/pearls
brooch pin

cut out a heart shape on a piece of paper and trace it onto cardboard, then cut it out.
cut about 1/2 in more on the sides of the heart onto fabric
cut along the sides of the fabric on the outside, after you have glued the cardboard heart to the back of the fabric.
start gluing the strips down on the back
 this will be the finished fabric covered heart piece
 cut out a smaller heart shape piece of felt to glue onto the back, where you had glued all the strips down
 with your 1in strip of fabric, fold it in half and glue a strip down about 1 in and start rolling the piece and glue it onto the center of the heart.
Now you can start gluing around and twist the piece as you go
I twist until I get to the bottom of the heart and I come back up to the left side of the heart and roll it into the center of the upper left part of the heart.
Then, I use the remainder part of the strip and starting from the bottom right I tuck it under and start twisting up to the upper right part of the heart until it is all filled in and coiled to the center of the upper right part of the heart (hope this makes sense)

 Now.. you have your heart shape filled in, next you glue along the perimeter of the heart, starting at the top in the middle and glue on your beads/pearls.. whatever you wish to use!
 last, but not least.. glue a brooch pin on the back and you are ready to rock!
I made these for the Beehive girls (12 year old girls in my church, that I am serving with)

We had a lesson on Integrity and we did purple heart invitations and had a packet for them to work on their personal progress.
I thought of the theme.. "Wear your heart on your sleeve" and made the heart brooch so they can remember to be courageous and stand up for what they believe in..yada yada yada.

Oh and don't worry.. you will burn your fingers from hot glue
and I got the pearl beads and pins from Michaels

Tuesday, October 4, 2011

Hot pads

had some scrap fabric laying around and thought I'd wip up some more decorative  hot pads for my kitchen.. and we like to use them as little place mats, for when our bowls or plates are hot.

they are 10"x10"
batting
bias tape
and I used white material for the back

Sunday, October 2, 2011

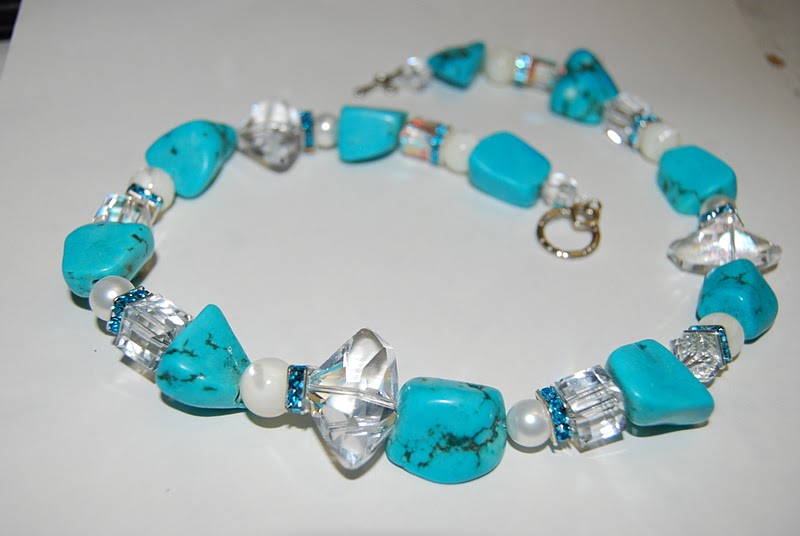
Turqoise

I love turqoise!
I remember loving it as a kid and my Dad brought me home a ring that had some turqoise in it, I think..
I just love the color and how the stones are all unique :)
I paired them with swarovski clear crystals, off white glass beads, and white pearl beads, with blue swarovski square spacers.

This necklace I made to go with an orange dress I bought.. that I've been looking for a good turqoise necklace to go with it, but couldn't find one I liked.. so I got some beads and made one myself.

Monday, September 26, 2011

fabric flower necklace


These were fun to make and fairly quick!
I got to make these for my Activity Days girls as a goodbye gift.. that I will no longer be working with since I am now going to be working with the Beehives in Young Women!

all you need is some scrap fabric, ribbon, glue (I used hot glue), felt, 2 hands with fingers, and embellishments (opt.. I used plastic pearl beads)

cut strips into 1"x24" or so.. the length depends on how big you want the rose..different sizes are nice.

fold your strip in half and place a strip of glue about 2 in from the top, down and start rolling the strip down. (this is your center part of the rose)

Now.. continue rolling your strip around and around.. twist the fabric as often as you like and I like to keep the strip upright to keep the flower flat, once it starts to get bigger.
place glue as your twisting and wrapping every now and then to keep it all together.

(if you have only a small strip, and you want to have a bigger flower.. when you get to the end, tuck the end of the strip and glue it to the back of the rose and from there start with another strip by gluing it to the back and continue rolling it around the previous made rose)


Once the rose is complete and you've glued the end piece to the back.
cut out a piece of felt in a circle the size of the rose on the back and glue half of it on.. so you can slide your ribbon in, before gluing the whole thing down.

I cut about 32" of ribbon and glued the middle part under the felt piece on the back of the rose and glued the other half of the felt down.
place your other roses on the sides.. and depending on how you want them place and make sure you glue the sides of the roses together as well.
The ones that are stacked closer together.. I also glued a piece of small ribbon on the back across the top 2 roses to keep them together more securely

Once all your ribbon is glued under the felt pieces and roses glued together the way you want them placed.. add your emellishments. glue them on and you are done!

which one do you like best and why?

Now I need to make some for my own girls :)

Paper Organizer

I found this idea from Pinterest..
 although I didn't use shipping boxes as suggested, because I didn't feel like going out and buying shipping boxes.. but if you have them on hand, I say that is a wise choice.

This took some time.. because it is more made from scrap cardboard, from leftover boxes from bunk beds.

 I cut up the boxes into the size cardboard I wanted and used hot glue and duct tape to piece it all together and then covered it all in scrapbook paper.

Now I store my scrapbook paper in it!